 |
| Even though its only the beginning, it still feels great to see some progress. |

Tuesday, October 2, 2012
Progress on the Nomad Travel Trailer
Well today I began the process of tearing apart my trailer. Only had time to take off the front window but hopefully I'll have the whole front end torn off by the end of the week and I can start repairing the floor this weekend!
Saturday, September 15, 2012
New (Temporary) Home For The Nomy
My friend Billy was kind enough to let me park my trailer over at his house while I work on it. Billy also happens to be a high end luxury kitchen cabinet designer and has every wood working tool you would ever need. So thats a not a bad thing either!
 |
| At Billy's house about to be torn apart and put back together! Also love the old Bronco in the back. |
 |
| Helpin Billy add some angle iron to his 4-wheeler trailer. Can you say "TearDrop"! |
 |
| Not very good for a pipe welder but I was in a hurry. I'll make sure to take better pride in my work on the next one. |
Monday, August 27, 2012
Nomad Camper Trailer Layout
Here are some Sketchup drawings I just made for the layout I'm thinking about doing in my camper. I want it to be a real simple and open design that makes the interior feel bigger than it really is. I also want the inside to have a more modern design and feel to it. Probly will go with white paint and trim and probly just some neutral accent colors. The outside will look almost just like it did when it was first built, so it will still have that retro feel, but I want the inside to feel more modern and new. If I ever get another vintage camper, I'll make sure it has all the appliances and cabinets inside, and I'll probly try to restore it to its original design and feel both inside and out. This one though since I'm starting from scratch, I'm gonna go for that moder Airstream look on the interior, just a little simpler than the Airstreams though since I'm tryin to keep costs down.


Saturday, August 25, 2012
Nomad Travel Trailer Restoration
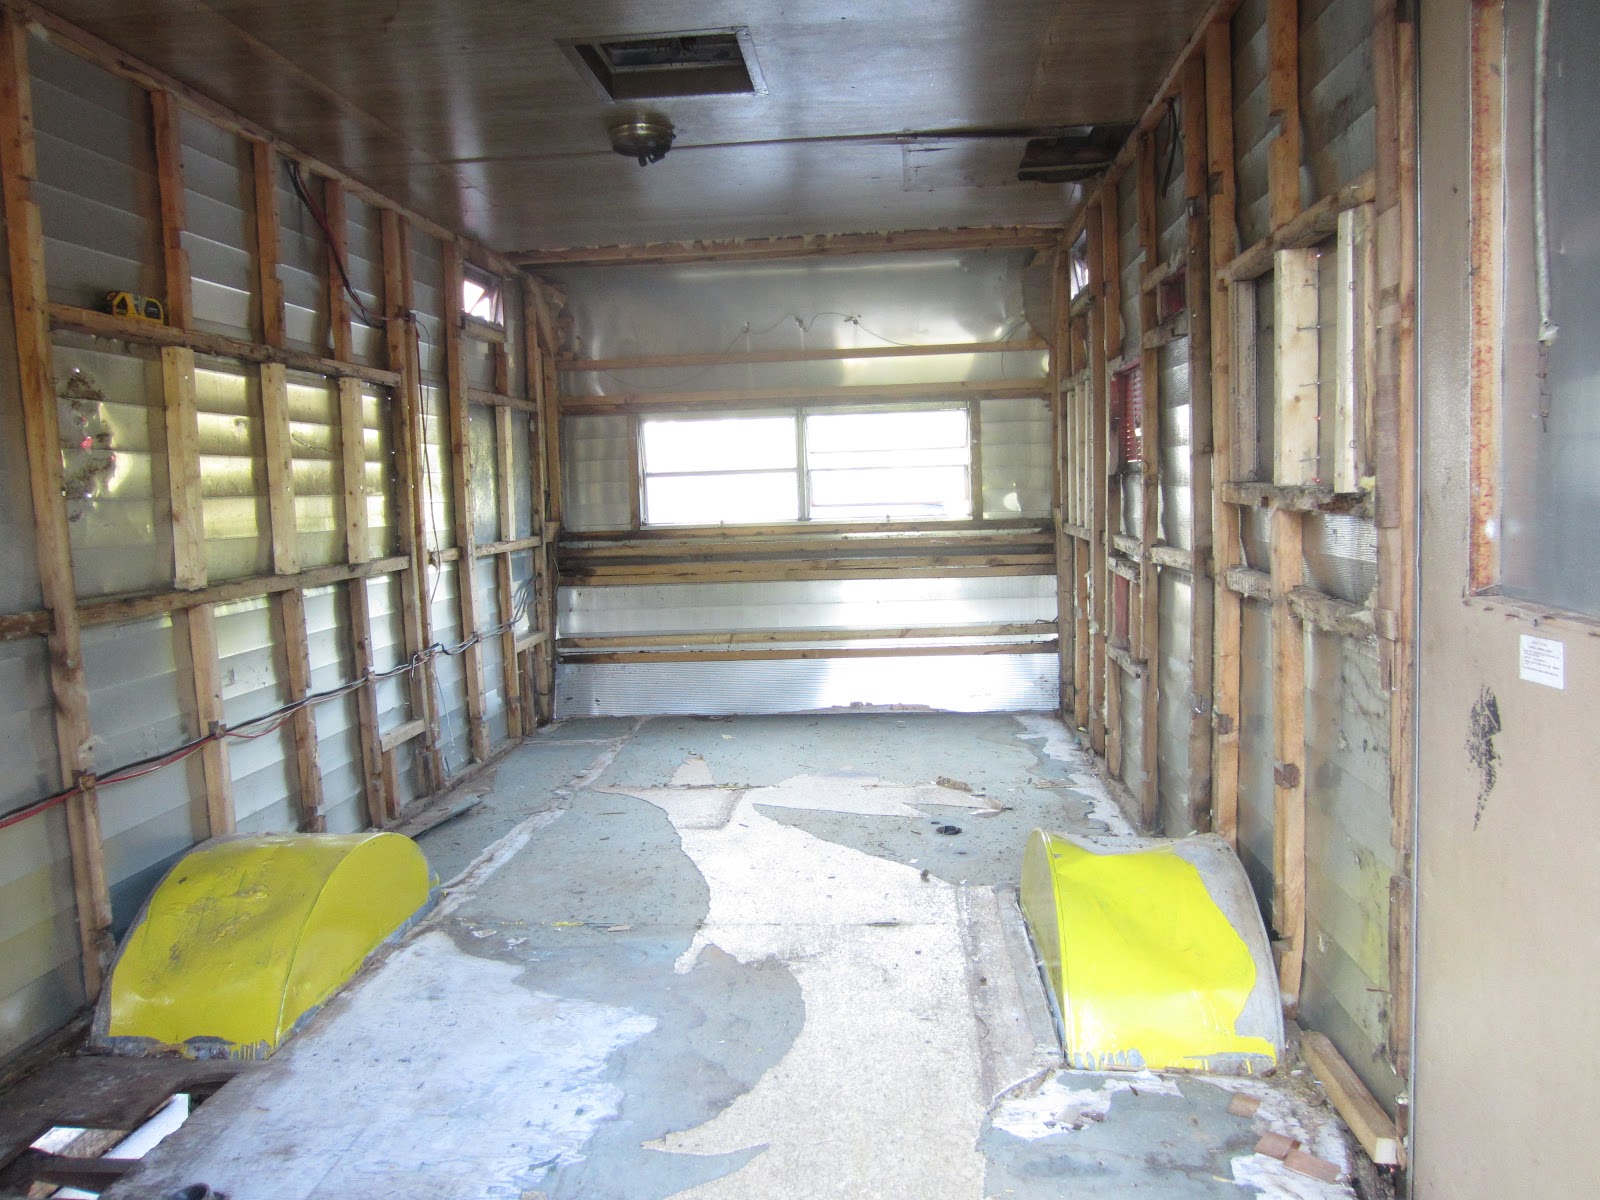
Upon further google research it seems that my 1967 nomad might just be a 1970 nomad. The only thing I have to go on is the dates the people place with the images. But I've seen a couple different photos of trailers that look just like mine that say 1970. Anyways, here are a couple more photos from tearing out the inside walls.


 So basically you can see that I have both side and front walls stripped down to the framing and I also pulled up the plywood the guy I bought if from had put down. Theres definitely a lot of wood that needs to be repaired including all the plywood on the floor and some of the framing. So far though things are looking pretty good. I'm hoping we can leave the side walls up while we replace the floor, roof, front and back. Then replace the sections of damaged framing on the sides as needed. Gonna hopefully take it over to a buddies house soon to continue working on it.


Friday, August 24, 2012
1967 Nomad Travel Trailer Restoration Day 1
Well after a lot of research I found out that my trailer is most likely either a 1967 or 1970 model. There isn't much information on this particular model of trailer but I found a few pictures that were like mine. I started tearing down the inside paneling today and found that there was some water damage inside but nothing that should be too difficult to fix. These trailers truly are tin cans. All that holds them together are 2x2s, aluminum sheet metal, and 1/8th inch wood paneling. Pretty amazing that thing is still standing.
It looks like I'm going to be replacing the front and rear end of the trailer. Not as difficult as it sounds just time consuming. Also will have to replace any ceiling paneling and framing that may be damaged but so far its not looking too bad. Here are some photos of what I've done so far.

 As you can see there isn't much holding these trailers together structurally. But once they're all together they're pretty sturdy. I plan on beefing mine up as much as possible as I'm pretty sure it was never meant to exceed speeds of 35mph.
Also a great site to learn all about how to restore these trailers is http://www.cannedhamtrailers.com/
The guy that runs the site makes hundreds of youtube videos explaining step by step how to do it. Will probly definitely be donating some money to that site when I get the chance, really great stuff.
It looks like I'm going to be replacing the front and rear end of the trailer. Not as difficult as it sounds just time consuming. Also will have to replace any ceiling paneling and framing that may be damaged but so far its not looking too bad. Here are some photos of what I've done so far.


Also a great site to learn all about how to restore these trailers is http://www.cannedhamtrailers.com/
The guy that runs the site makes hundreds of youtube videos explaining step by step how to do it. Will probly definitely be donating some money to that site when I get the chance, really great stuff.
Thursday, August 23, 2012
Vintage Nomad Travel Trailer!
Well I was perusing through craigslist today came across a vintage canned ham style travel trailer. Despite my better judgment I called the guy up, drove over to his house, and drove away with the trailer. Fortunately it only set me back $400.
The main thing I was looking for was a frame to build off of, and for $400 it was a good deal. As far as the rest of the body goes, I have no idea yet what I've gotten myself into. Fortunately the inside has already been gutted out and he put up vinyl siding for the walls. I'm going to tear out the vinyl tomorrow and see what I'm working with. I know the back has some damage to it as someone had chop about half a foot or so off and put up a rickety make shift wall and door. So I know I'll at least have to replace the back. Supposedly the roof is solid but we will see tomorrow. I can work with the back needing replaced but if the rest is too far gone then I'll just tear the whole thing down and start over. We will see!
 The dude covered over the windows with sheet metal. Not sure why. He did give me one of the original windows though and 4 other windows they may work.
 The guy also gave me a fresh water tank and a 12 gallon water heater. Tomorrow I will tear down the vinyl and see what I have to work with.
The main thing I was looking for was a frame to build off of, and for $400 it was a good deal. As far as the rest of the body goes, I have no idea yet what I've gotten myself into. Fortunately the inside has already been gutted out and he put up vinyl siding for the walls. I'm going to tear out the vinyl tomorrow and see what I'm working with. I know the back has some damage to it as someone had chop about half a foot or so off and put up a rickety make shift wall and door. So I know I'll at least have to replace the back. Supposedly the roof is solid but we will see tomorrow. I can work with the back needing replaced but if the rest is too far gone then I'll just tear the whole thing down and start over. We will see!


Tuesday, August 21, 2012
Tiny Travel Trailer Plans
Hoping to go out on the road soon and would like to try building a diy travel trailer. There is a growing number of people building their own teardrop campers. I think the teardrops are great for weekend camping but I'd like something I can stay in for 2 or 3 months at a time. My solution for this is to use the same foot print as a teardrop(4x8 foot harbor freight trailer), only make it taller in order to add a bathroom and shower. Not sure if it would work or not but I'm going to keep doing research and probly eventually try building it. here are some pictures of the lay out I'm thinking about.


 And here is a real world illustration of the 4'x8' footprint. The bed area is just large enough for me to laid down flat in (22" x 72")

Here is the closest thing I've found to what I want to build. Only difference is its 5'x10' and the floor plan is different. But the outside is pretty similar.

I made this design in google sketchup and did the lighting with the twilight render plugin. This design really only works for one person. That person also needs to be somewhat small. If I gain a lot weight or get on steroids, I most likely would not be able to fit inside my trailer.

Pipe Welding Practice
Here are some photos of piece of pipe that I've been practicing welding up. Being able to produce a good test piece is one of the most important things you'll ever have to do as a welder. It usually means the difference between just getting by financial and being relatively well off. Obviously you have to know how to actually wield once you get in the field or shop or plant. but if you can't pass the your test you'll never even get the chance.
 Here is a piece of 6" schedule 40 I welded while on my breaks. The cap doesnt look that great but its good enough to pass. This was one of my early pieces as well. Probly my 8th or 9th try at the 6" combo test.


Here is a piece of 6" schedule 40 I welded while on my breaks. The cap doesnt look that great but its good enough to pass. This was one of my early pieces as well. Probly my 8th or 9th try at the 6" combo test.
Here is a piece of 6" schedule 160. This is just were I filled it up to flush with 7018 rods. Doesn't look great but it wasn't too bad for my first time filling up a big bevel like that.

Now here are the real money makers, 2 inch "monster coupons". Not sure what schedule they are but the walls are 5/8" thick. This is the standard test required for most nuke plants and other similar jobs. The only other test like this is with "super coupons" which are like these only with even thicker walls. I ordered these monster coupons from a website called trieng.com and they cost about $300 with 3 day shipping.

My summer time practice booth setup. Basicaly just a $50 ezup, a make shift pipe stand, a light, and a work table. In my dads back yard.

My first root and hot pass on the monster coupon. Not too shabby!

The first couple 7018 fill passes. Sadly it kind of went down hill after that but nothing a little grinding couldn't fix.

And my first welded out combo monster coupon. Not great but not too bad either. Now time to go practice some more.
Finishing My 65 Watt DIY Solar Panel
Earlier this year I decided I would try building my own solar panel to see how easy/cheap it would be. Its turns out its pretty easy but not quite as cheap as I thought it would be. My panel cost around $150, where a commercial panel of the same size would have been around $200 not including shipping. I could have spent a little less if I had bought the solar cells in bulk or found salvage glass ect. But i just bought what i needed to try things out. Also had I built a 120 watt panel, the cost would have been a little over $200, versus a commercially made panel of the same size would have been about $300. So the larger you go, the more money you'll save.
I started by buying the solar cells off ebay (see post below) and soldering, aka tabbing, them together. Once I knew what size glass I needed (26" x 32") I went to the local glass supplier and ordered my sheet of glass which cost about $45.
Then I went to the local steel supply shop and picked up 20 feet of 1"x1" angle iron($16). I cut and welded the frame together, put in the glass and sealed it with silicon sealant. (Note: if you don't have access to a welding machine, the best thing to do is order an aluminum solar panel frame off ebay for around $35)
(To see pictures of how I made the frame, see the post below)
Next I had to install the solar cells in place and encapsulate them with silicone resin. The purpose of encapsulation is to keep moisture and condensation out.

Here is the frame with glass and paint sitting in my dining room, ready to have the cells installed and encapsulated

Here are the cells set in place ready to be taped down and encapsulated

Here are the cells taped down. I didn't get a shot of the resin being applied but it basically looks just like this photo since its completely clear.

And here she is finished and powering a small 12v computer fan. Not very impressive I know but its capable of powering about 20 of those fans simultaneously. Also the idea is to charge up deep cycle 12v batteries which are capable of powering almost all of your house hold electrical needs.
Welp thats it. I hope you liked my home made solar panel. Next time I'll probly spend the 15 or 20 extra bucks and buy the aluminum frame off ebay. Also I'm going to try out the dimpled glass they sell on there too. Supposedly it works better the normal tempered glass that I used.
Tuesday, July 3, 2012
Solar Panel Frame

The fab shop aka dads tool shed

My trusty Miller Maxstar atop a high dollar welding stand.

1 inch angle iron used for the frame

Marked and ready to be cut

So much can be accomplish with a 4 inch Dewalt angle grinder

Angle iron cut and read to be tacked together

Frame is tacked on all four corners and then welded out as seen here.

The frame welded out and ready to be painted

First it gets a coat of primer

And then a nice coat of metallic silver paint. Unfortunately this was indoor paint so I had to sand it back off and repaint it with some textured out door pain the next day after I installed the glass.

Glass installed and held into place with this small brackets which are tacked on. Also a layer of silicon sealant is applied for waterproofing.

Glass installed ready to be repainted with the proper paint.
The next step is to order some epoxy resin, and taped down the cells and encapsulate them with the resin.
Friday, June 29, 2012
Solar panel
I'm in the process of building my own 65 watt solar panel. Here is a pic of all the solar cells tabbed together. Now I'm about to go buy some angle iron to cut and weld together for the frame.

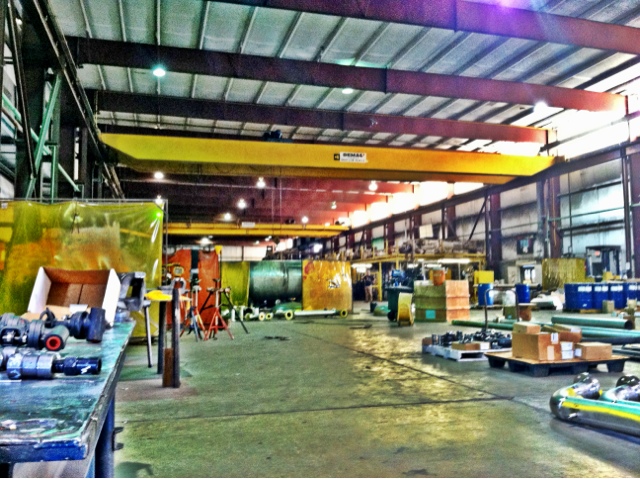
Pics From Work
I help make the stuff, that makes a lot of your stuff. Good or bad it provides me a good living for the time being, and its my temporary way out of financial burden and a life indebted to a financial institution. I hope one day to either be working for myself and/or welding and fabricating for a company that doesn't play a role in the destruction of people or the planet. An example of this might, sustain-ably produced steam for energy generation, or bio fuels.

A hydrogen membrane unit whosa whatsit
Instagrammin!

A weld made by the golden arm of all golden arms, Howard. Hes been welding for 42 years and he is a master. Unfortunately this picture makes this weld look pretty crappy but in real life it looks amazing. I hope one day to be able to weld that this.
iPhone
Just got an iPhone a few days ago. Having my email and iTunes library with me at all times is awesome. I didn't set up my Facebook or twitter account because I don't really like either of those social media sites. I certainly don't want to carry them around in my pocket at least.
Anyways I think I'm gonna try and post a bunch of photos on here I take with my phone. Hopefully I'll be doing some traveling soon and have some good pics to put up.
Anyways I think I'm gonna try and post a bunch of photos on here I take with my phone. Hopefully I'll be doing some traveling soon and have some good pics to put up.
Monday, April 16, 2012
First Post In 3 Years!
This is my first post on the this blog in over 3 years. I had a Tumblr blog for awhile but grew tired of it and deleted. I decided to try this one again.
Subscribe to:
Comments (Atom)